
Decks, stairs & outdoor timber
Timber rot in outdoor stairs and decks: what to look for, and when to fix it.
A rotten stair tread rarely looks dramatic until the day a foot goes through it. Here's how to check your own outdoor timber, what's fixable, and how to keep rot from coming back.
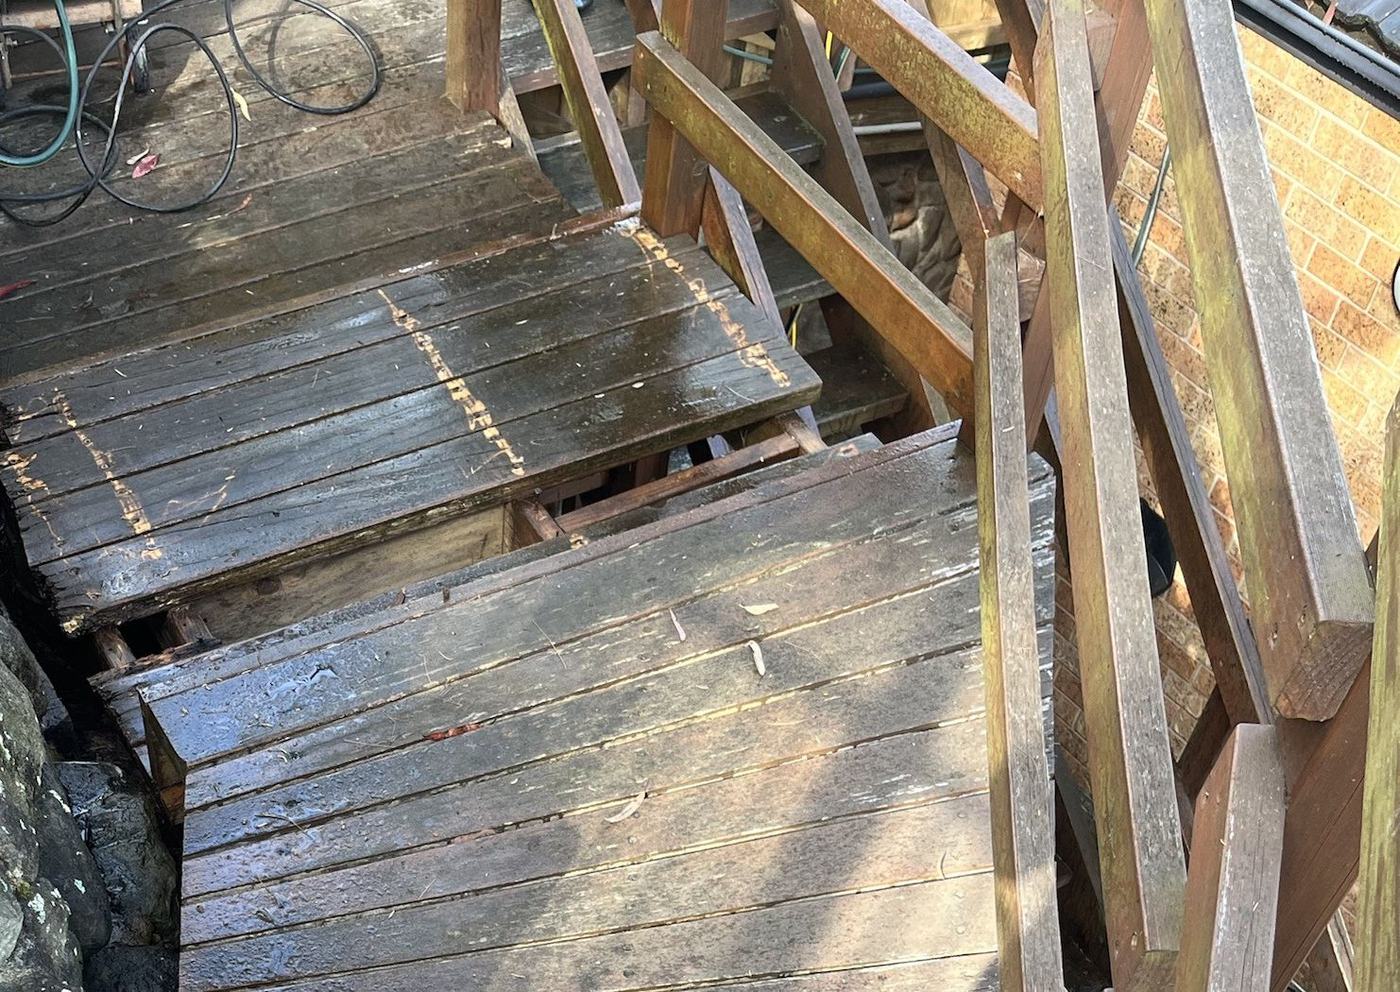
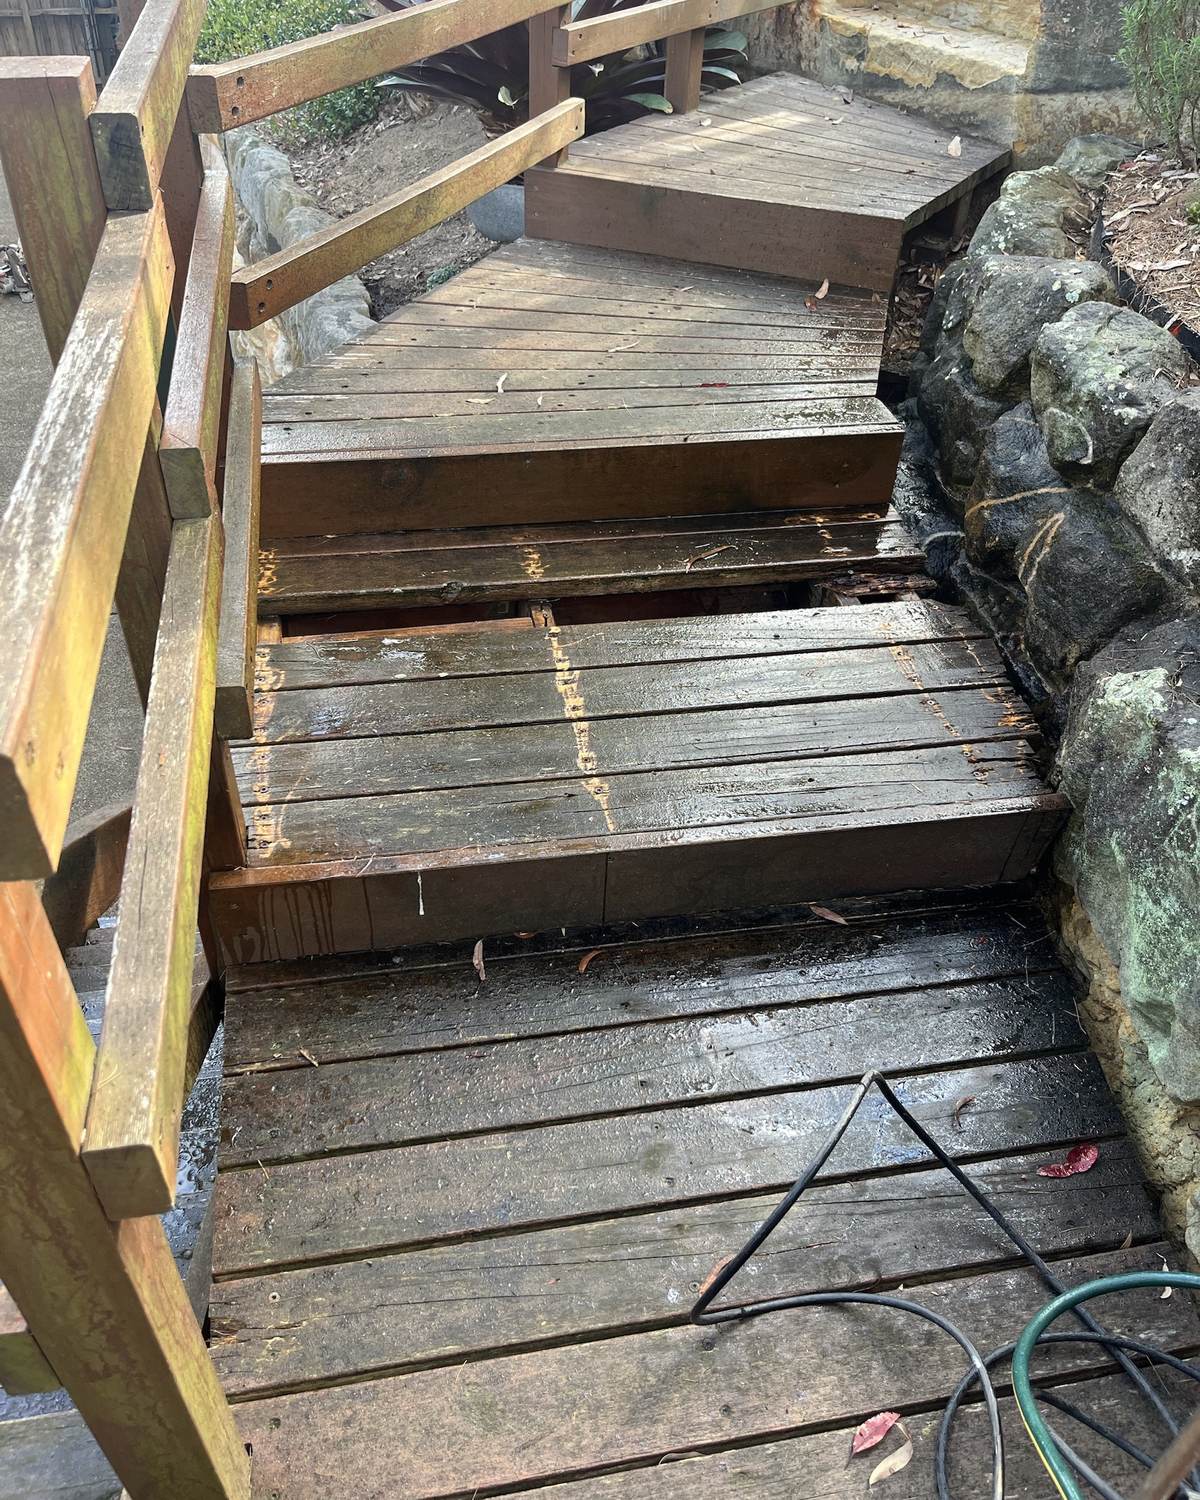 Before
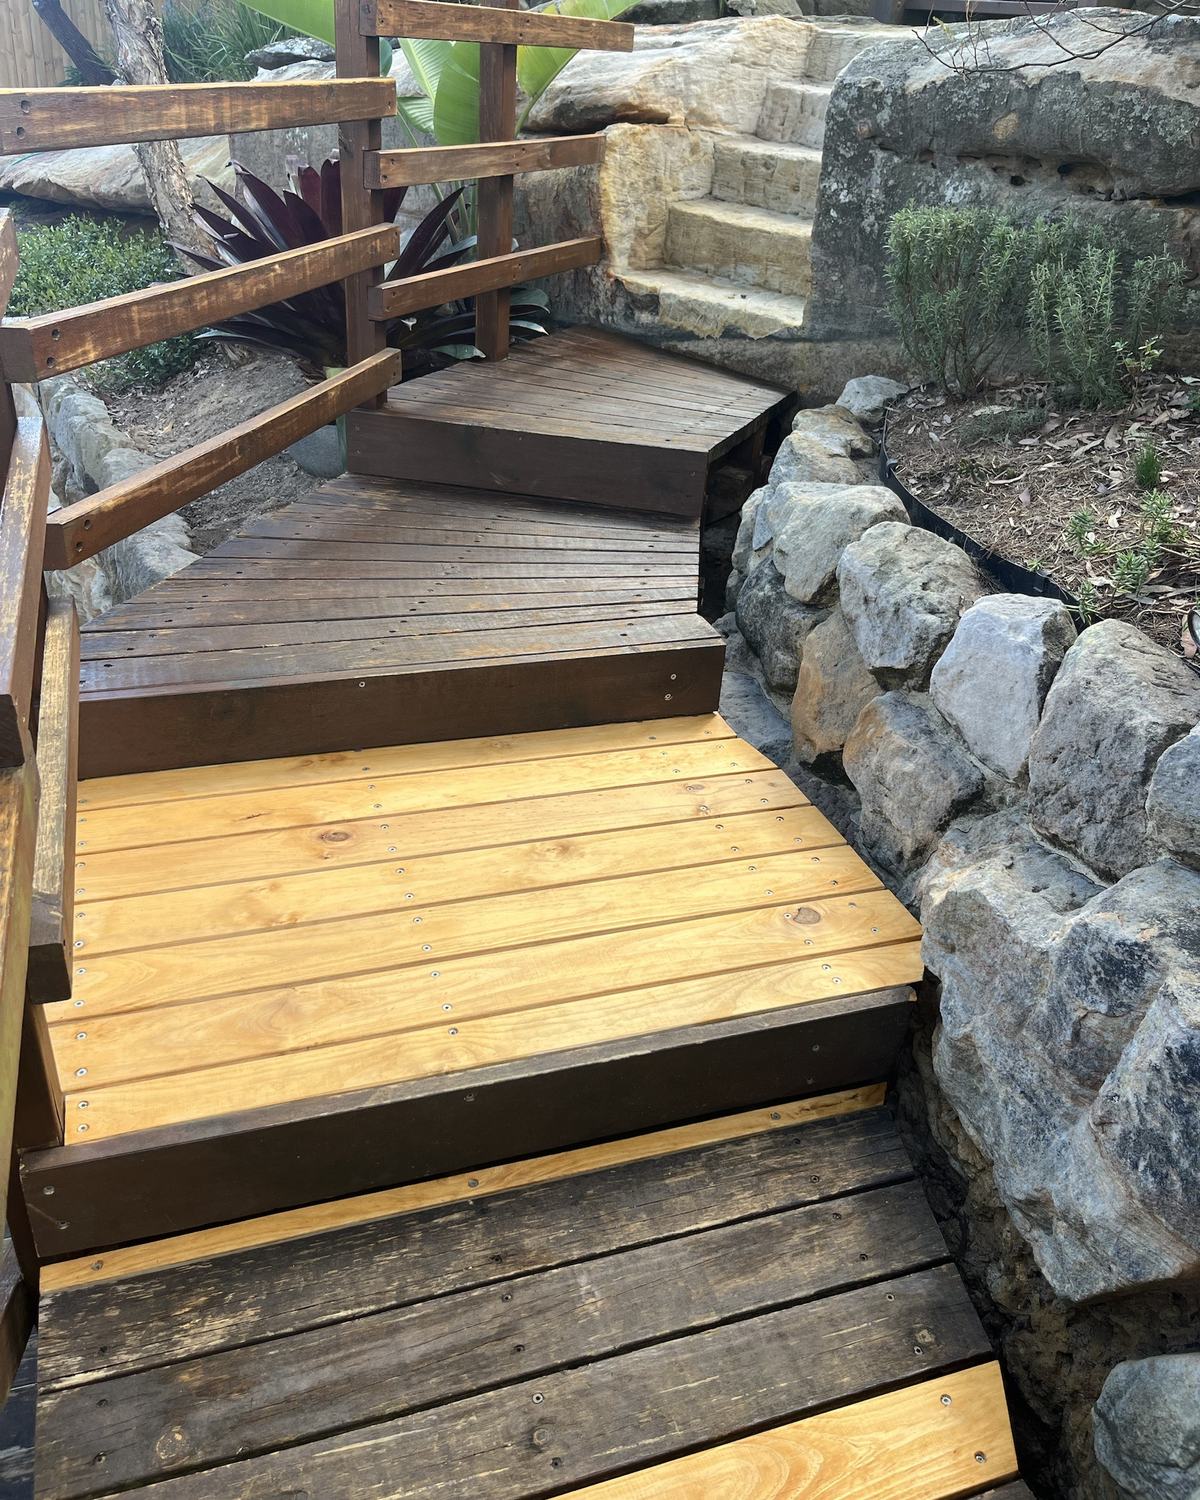 After
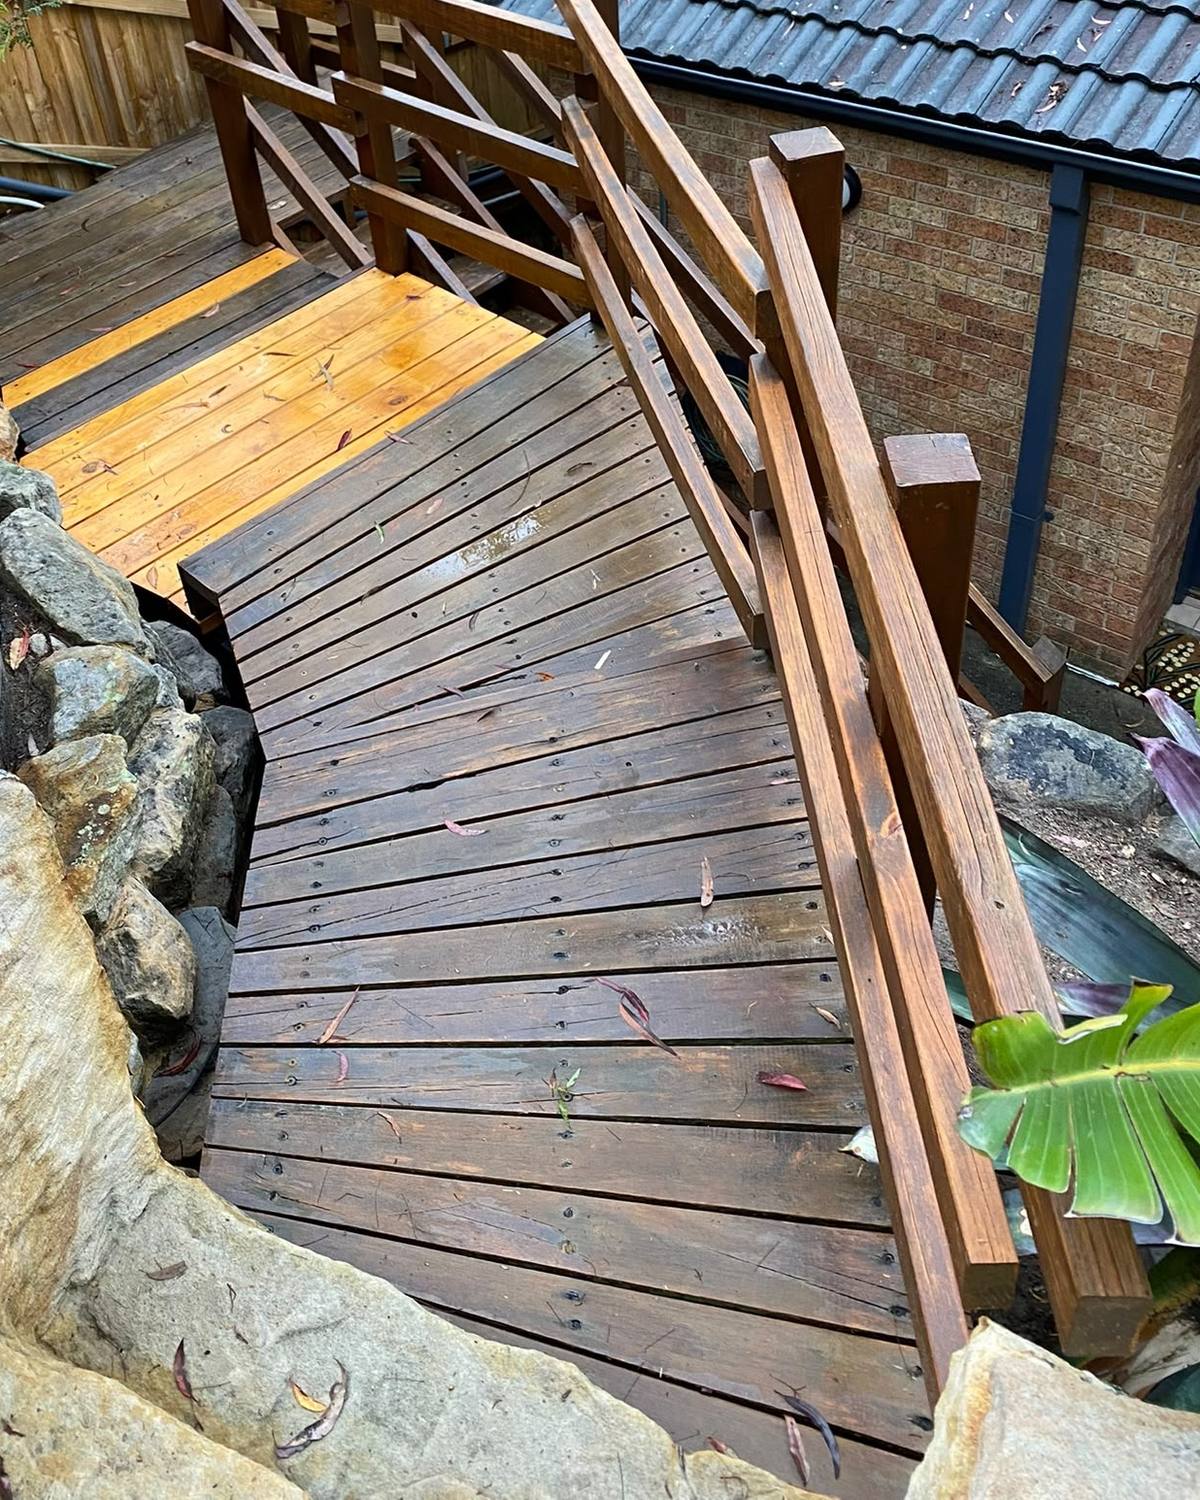
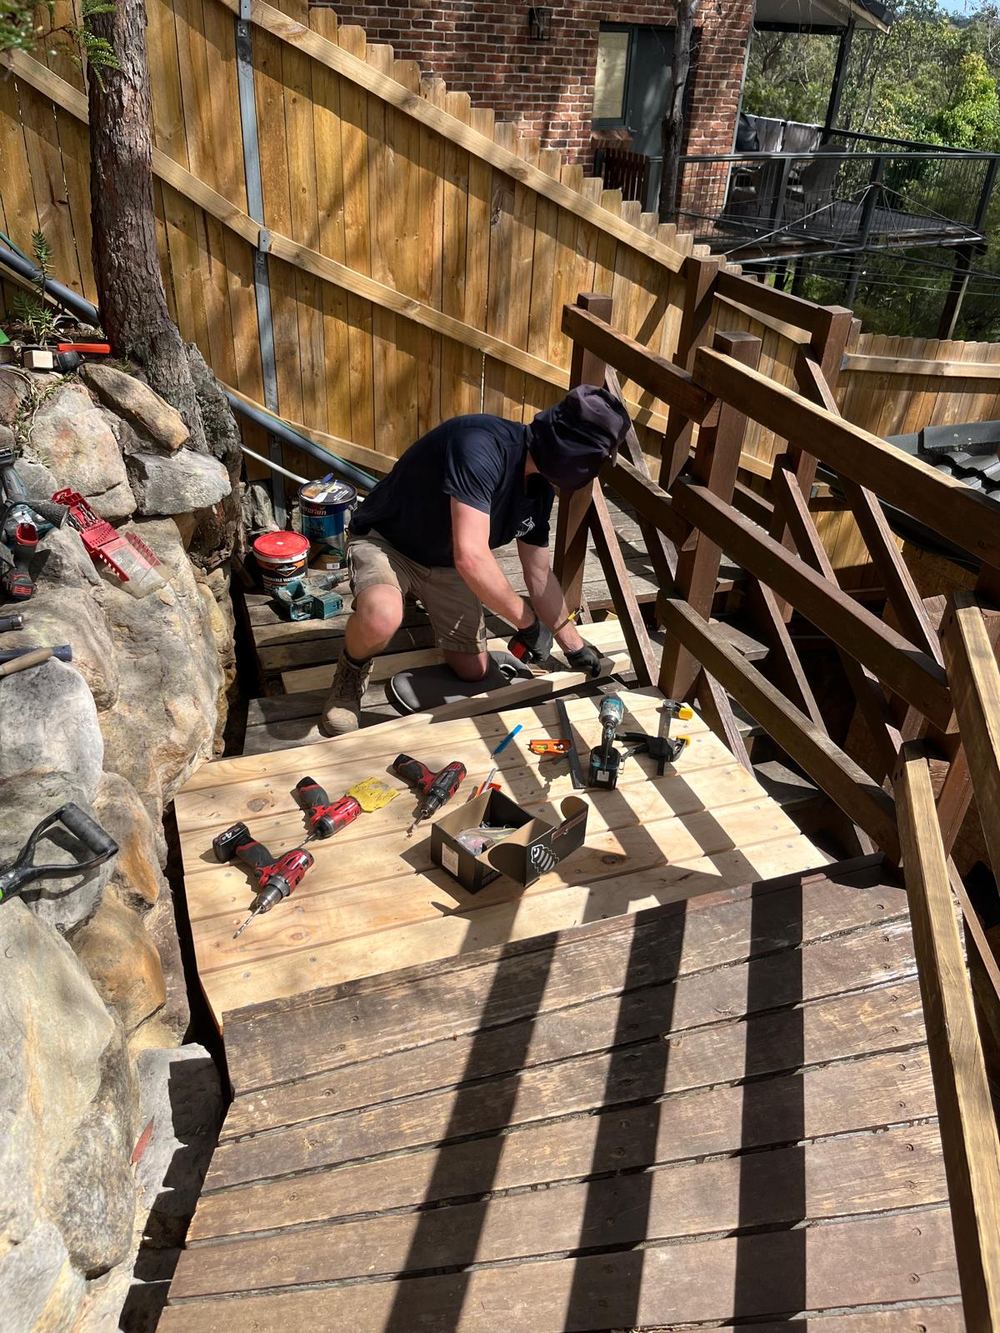
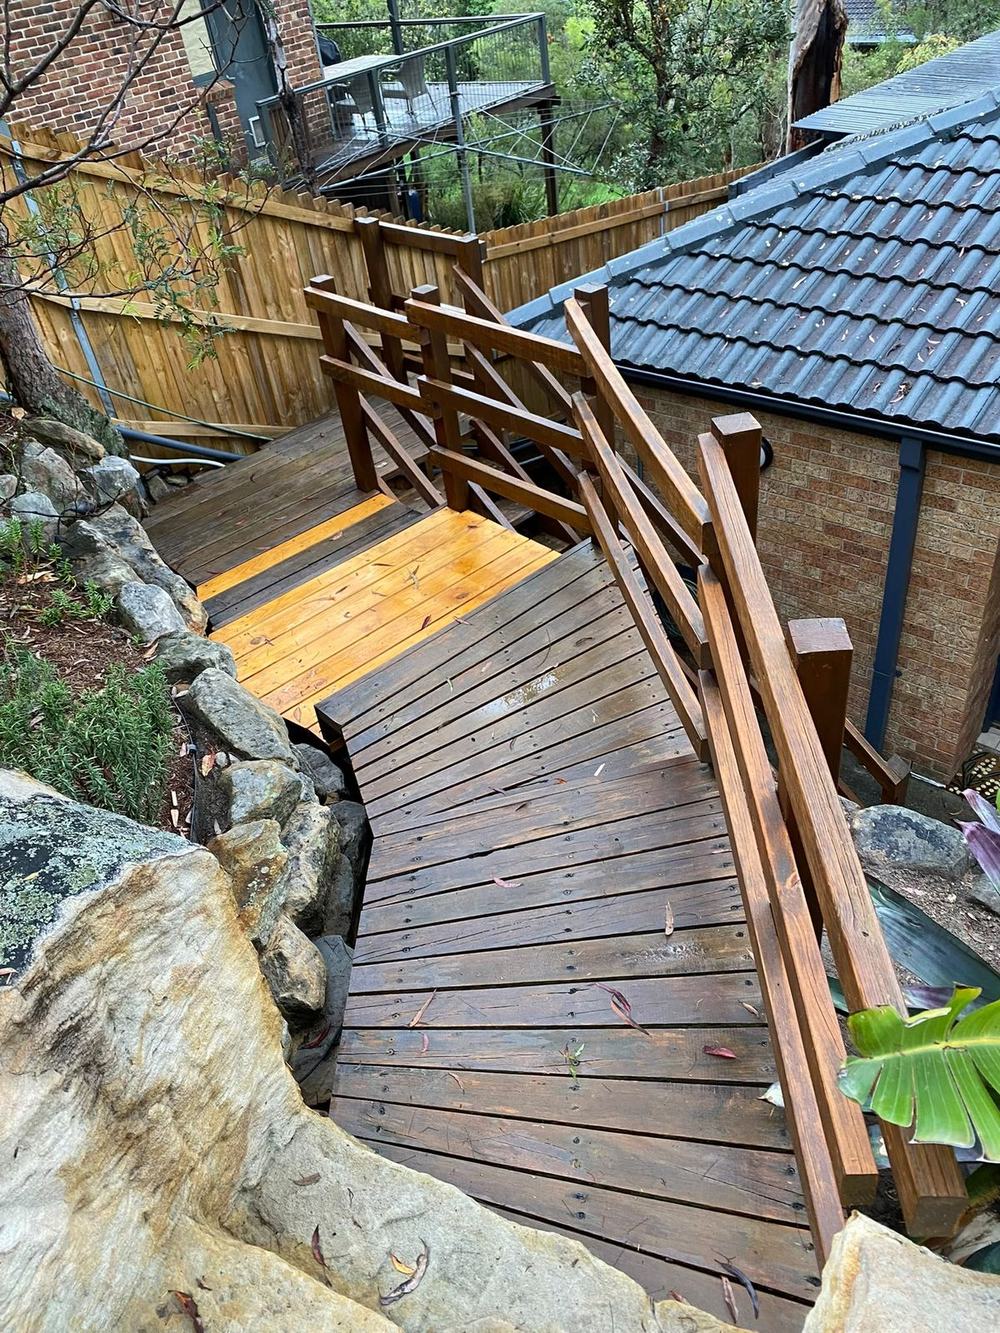
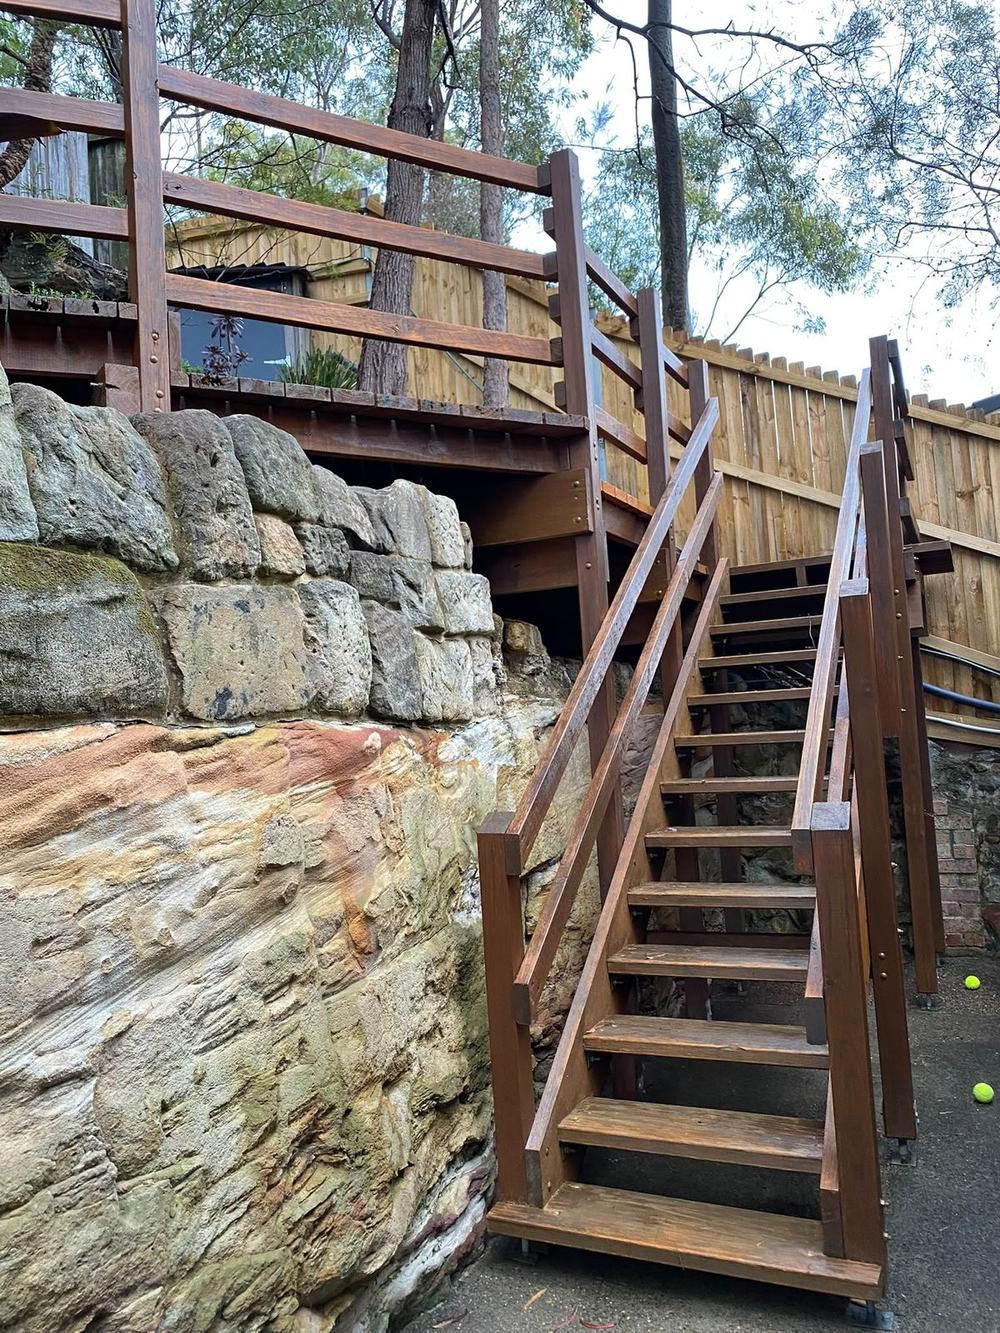
AfterGarden stairs in Mount Colah. The treads hard against the sandstone wall had rotted through; they were cut out and replaced. More before & afters.
Why outdoor stairs rot first
Timber rot is a fungus. It needs three things: timber, oxygen and moisture that hangs around. Take away the moisture and rot can't get going, which is why a well-drained deck in full sun can last decades while the stairs down to the pool are soft after ten years.
Stairs get the worst of it. Water runs down them, every tread has cut ends soaking it up, and they usually finish close to soil, garden beds or a retaining wall. Around the Upper North Shore there's a local twist too: gum leaves and bush litter pile up in the corners and against the stringers, hold water like a sponge, and keep the timber damp for days after rain. Shaded, sloping blocks backing onto bushland are where James sees it most.
The places to look first:
- Where a tread meets a wall, rock or garden bed. Leaves and soil collect there and never dry out.
- The bottom of the stringers (the angled side boards that hold the treads), especially if they sit on soil or pavers instead of a raised bracket.
- Cut ends and screw holes. End grain drinks water far faster than the face of a board.
- Under the stairs, where it's dark, damp and nobody looks.
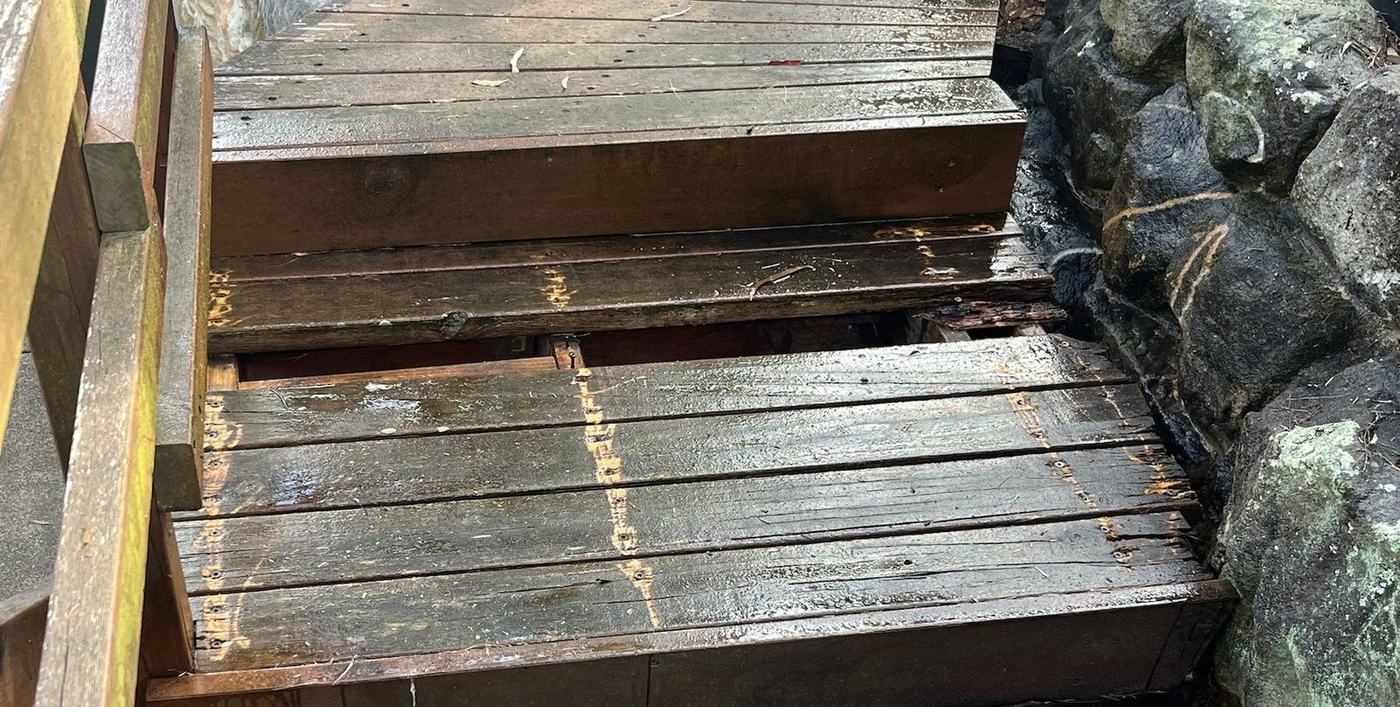
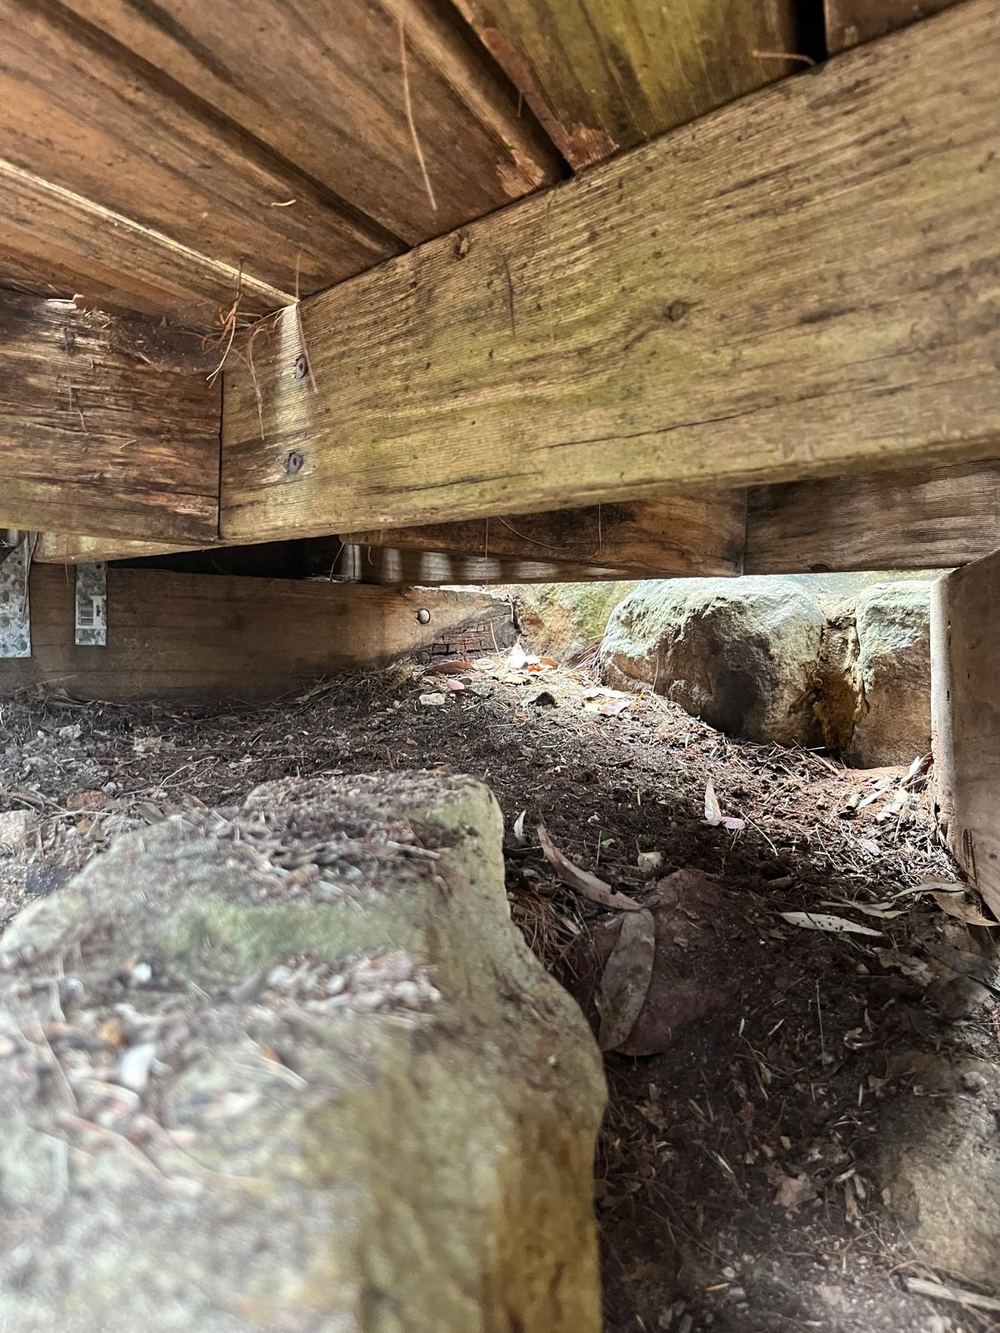
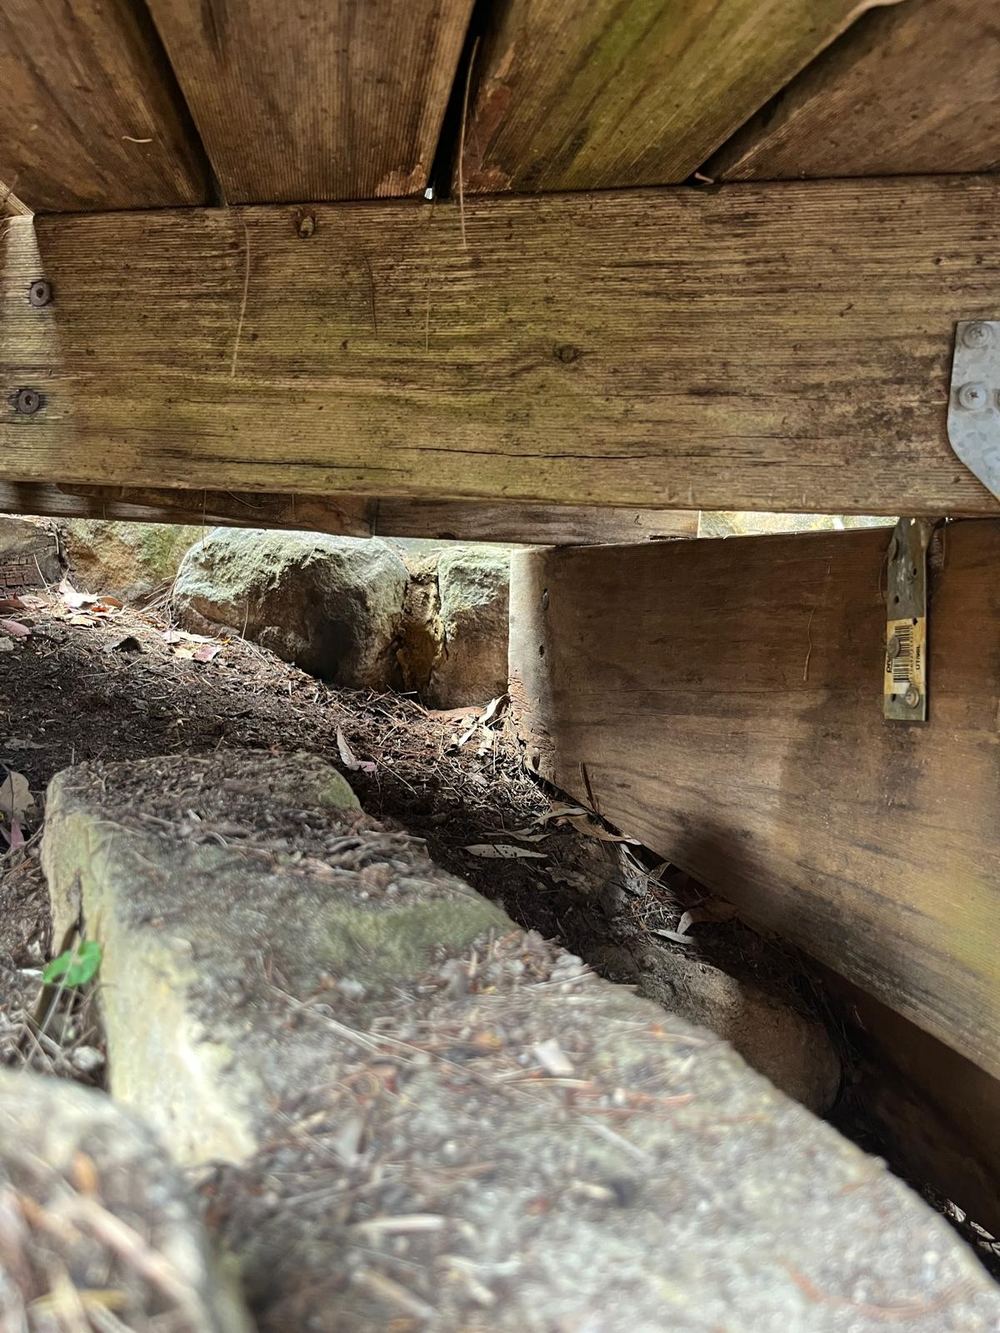
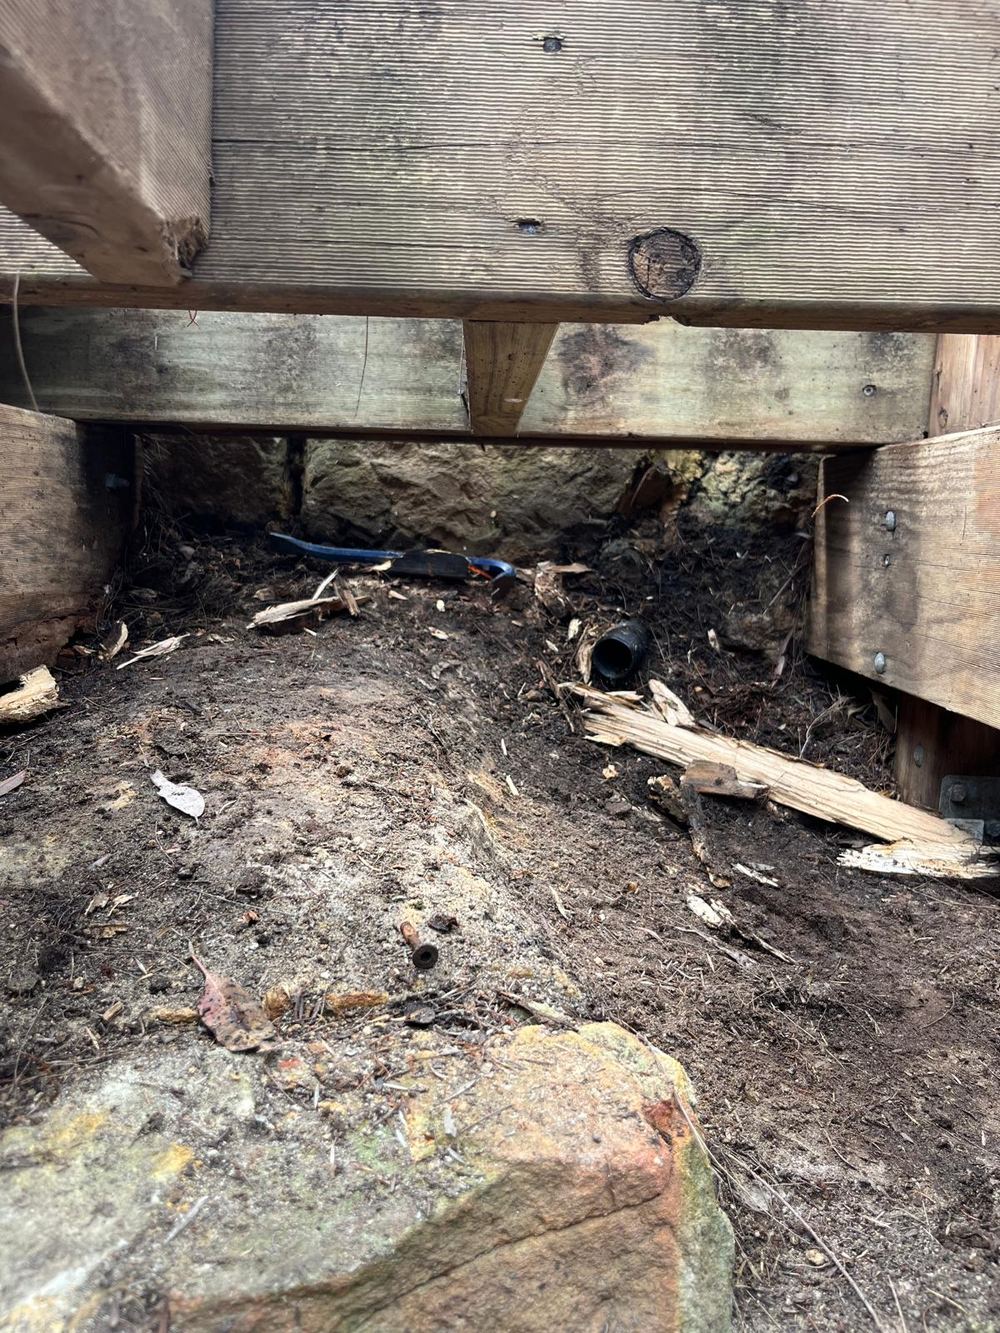
Signs of rot to check for
- Soft or spongy underfoot. A tread that flexes or feels different from the others.
- Dark staining that won't scrub off, particularly at the ends of boards or around fixings.
- Cracks running across the grain or timber breaking into little cubes. Healthy timber splits along its length.
- Fungus, moss or white threads on or under the timber.
- Screws or nails that spin, lift or pull out easily. The timber around them has lost its grip.
- A musty, damp-earth smell under the stairs or deck.
- Bounce or lean in the whole flight, or a handrail post that moves. That points to the structure, not just a tread.
The five-minute screwdriver test
You don't need special tools to check your own stairs. Take a flat screwdriver and push the tip into the timber at each of the spots above, ends of treads, bottoms of stringers, around fixings.
- Sound timber resists. The tip goes in a millimetre or two and you have to work to lever out a splinter, which comes out long and stringy.
- Rotten timber lets the tip sink in with little effort, and what comes out is short, crumbly or wet.
Test a few spots on the good boards first so you know what normal feels like. If several spots are soft, or anything structural is soft, stay off that section until it's looked at.
Safety first. A tread that gives way mid-step is a nasty fall, and stairs to pools and gardens are often used carrying things or in wet weather. If a tread is soft, block it off or mark it until it's fixed. If you're helping an older parent stay at home, outdoor stairs and handrails are worth checking every year.
Rot or termites?
It matters, because the fix is completely different. Sydney has plenty of both, and termite damage can look like rot at first glance.
- Rot usually shows on the surface: dark, soft, cracked or crumbly timber in the places that stay wet.
- Termites eat from the inside. The surface can look fine but sound hollow when tapped, and the timber inside is layered or honeycombed, often with packed mud. Look for mud tubes (pencil-thick tunnels of dirt) running up piers, walls or stringers.
If you see mud tubes, hollow timber or live termites, don't break it open or spray it. Disturbing them can send them elsewhere in the house. Call a licensed pest controller for an inspection first; repairs come after the termites are dealt with. James will tell you straight if he suspects termites rather than rot.
Repair or replace?
Most of the time, rot is caught in a few treads and the stairs can be repaired rather than rebuilt. As a rule of thumb:
Usually a repair
- One or a few rotten treads or decking boards.
- Soft patches at board ends, with the rest of the board sound.
- Loose or failed fixings in otherwise solid timber.
Needs a closer look
- Rot in the stringers, bearers, joists or posts that hold everything up.
- Rot in more than a handful of places, or the whole flight bouncing or leaning.
- Anything that could be termites.
For the Mount Colah stairs in the photos above, the frame was sound, so the job was to cut out the failed treads, check the timber underneath, and fit new boards. New timber goes on with galvanised or stainless fixings, cut ends are sealed before fitting, and the new boards are left to weather and then oiled to blend in with the old.
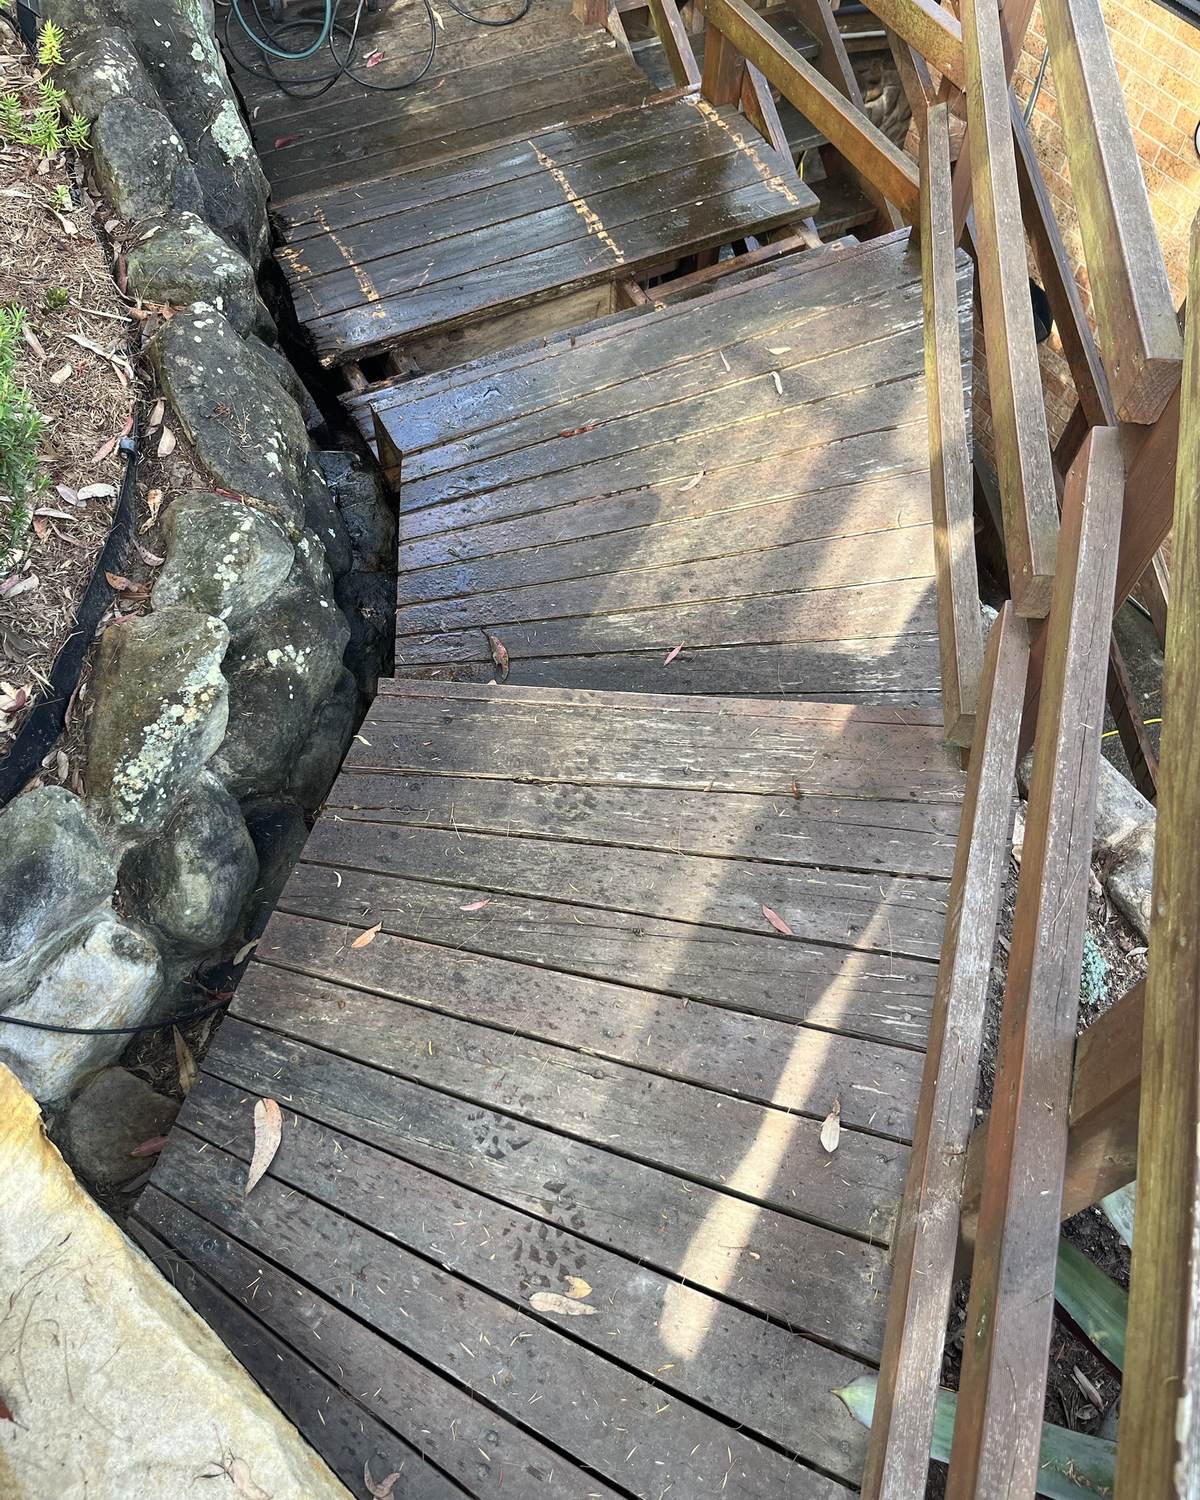 Before
 After
After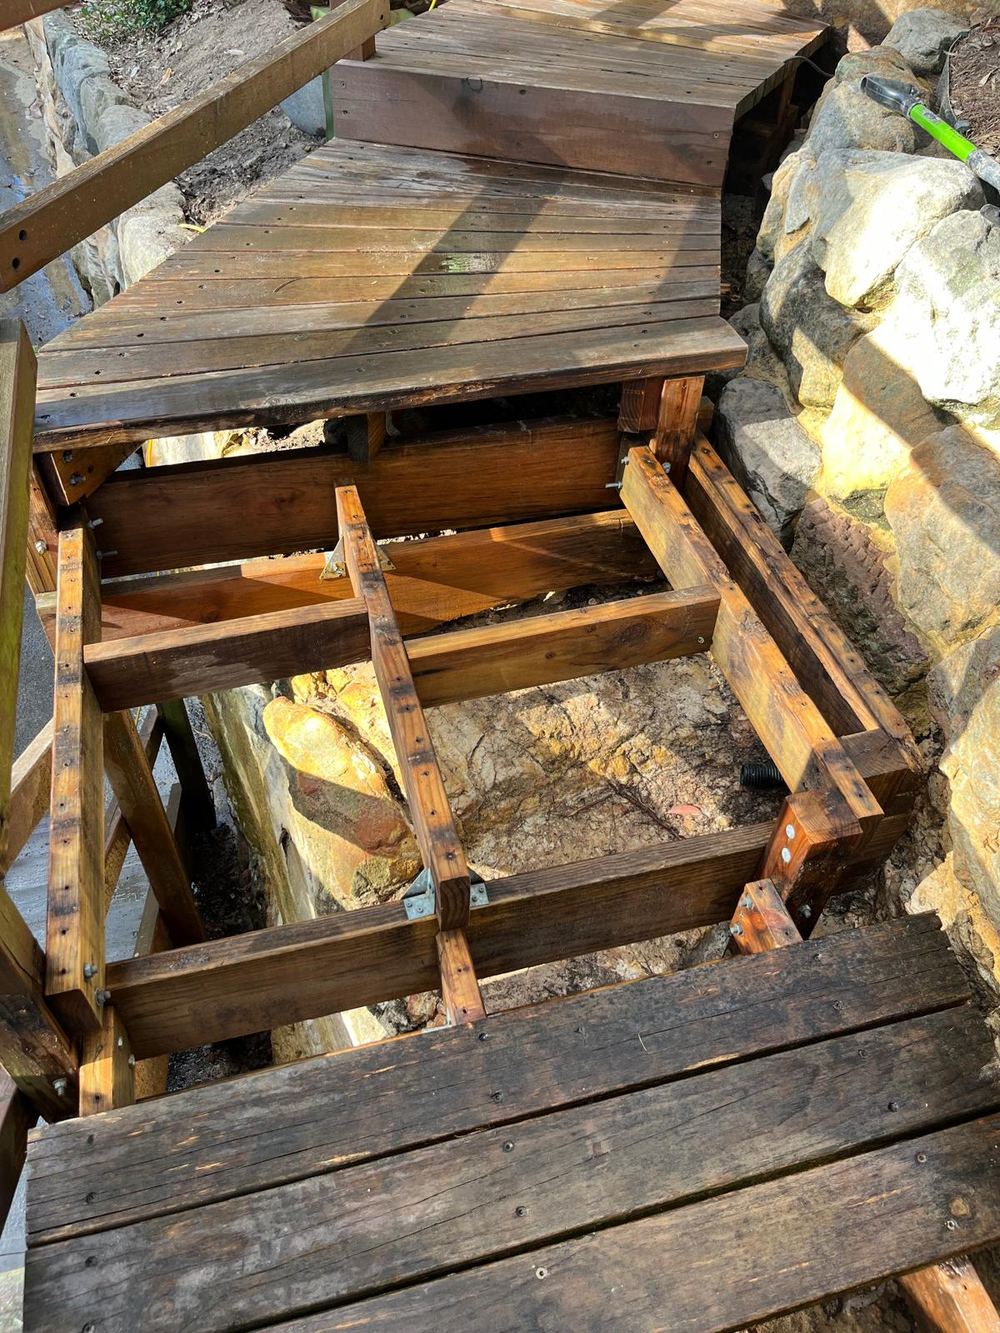
Choosing the right timber matters too. For outdoor stairs, treated pine needs to be the right hazard rating: H3 for timber above ground and H4 where it touches soil. Hardwood is tougher underfoot but still needs to be kept off the ground and given airflow.
Stopping rot coming back
Rot needs moisture that sticks around. Most prevention is simply helping timber dry out:
- Keep leaves and soil off the timber. Sweep or blow out the corners and the gaps between boards, especially after storms and in autumn. Pull garden beds and mulch back from stringers and posts.
- Keep the gaps open. Board gaps let water drain and air through. Clear them with a putty knife if they've packed up with debris.
- Re-oil or re-stain regularly. Most outdoor timber finishes need a recoat every one to two years, sooner on stairs that get full sun or heavy foot traffic. When water stops beading on the surface, it's time.
- Check under the stairs once a year. A torch and the screwdriver test will find most problems while they're still a tread, not a staircase.
- Fix drips and runoff. A leaking tap, overflowing gutter or garden sprinkler aimed at the stairs will rot them faster than rain ever will.
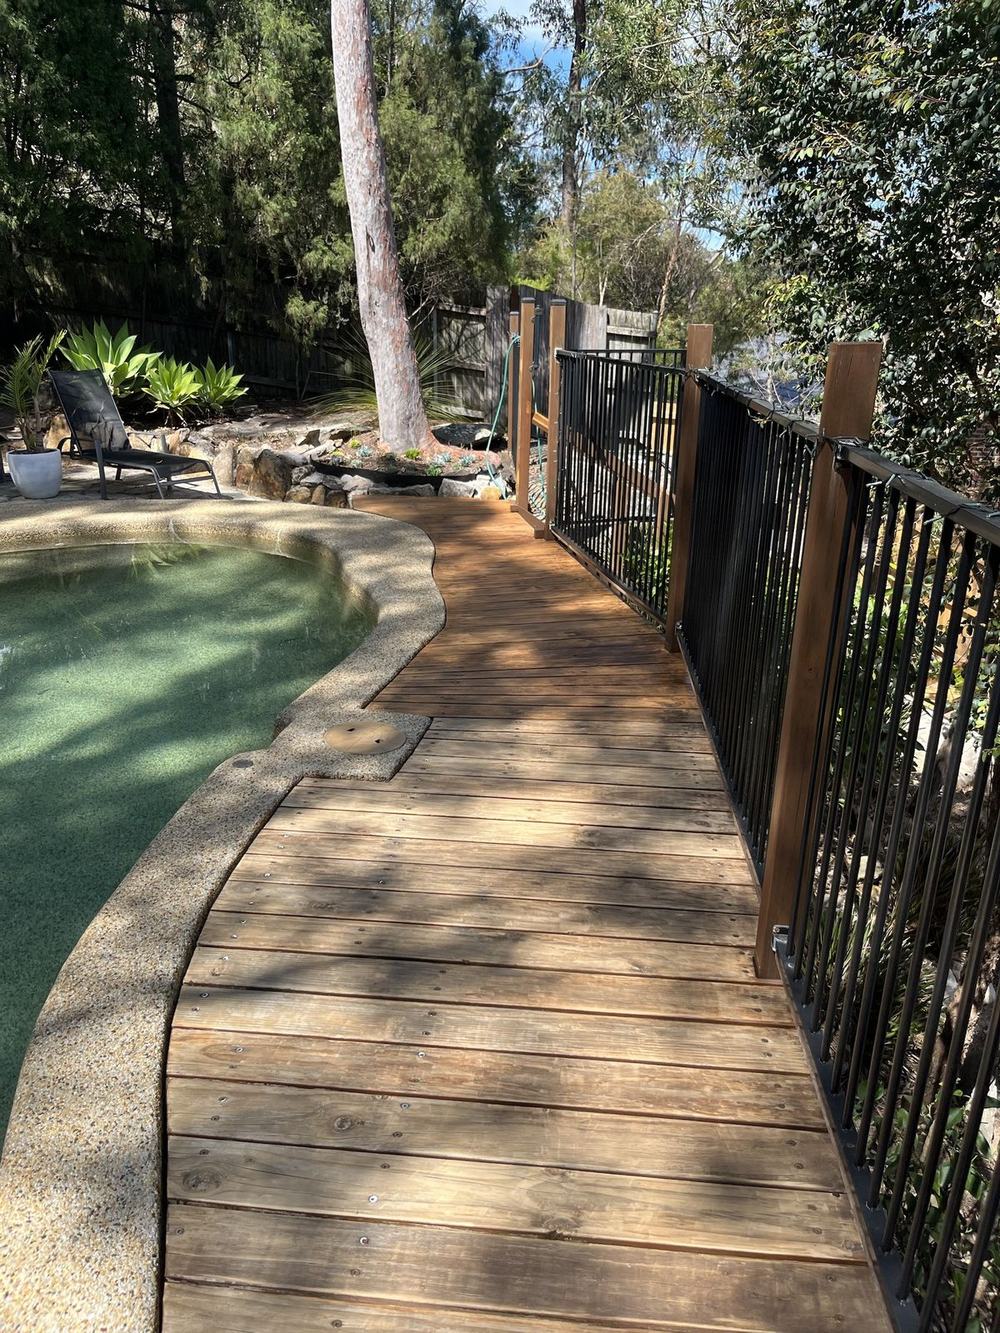
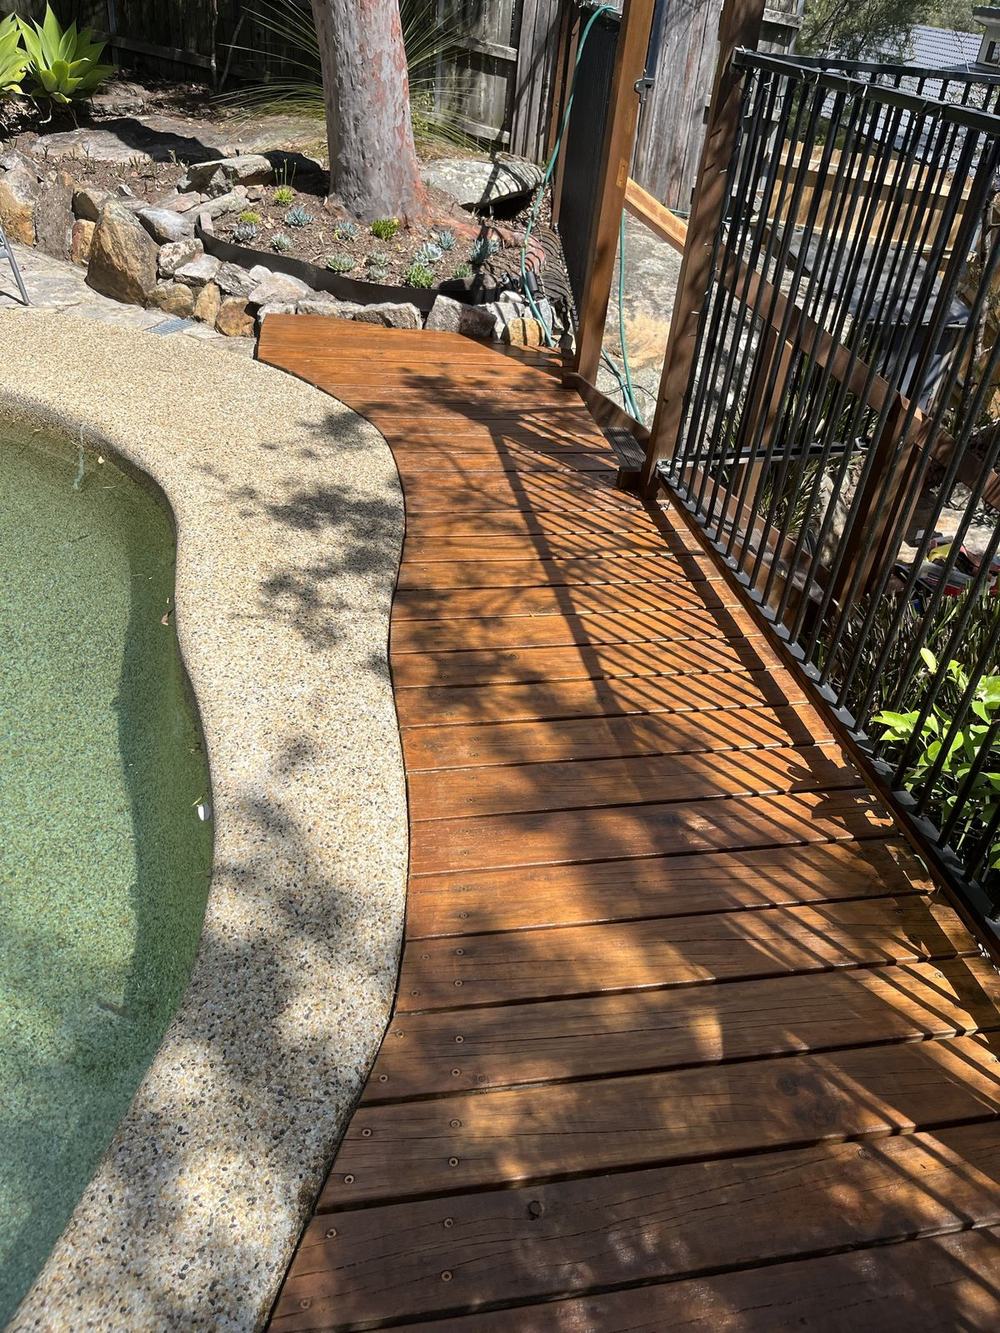
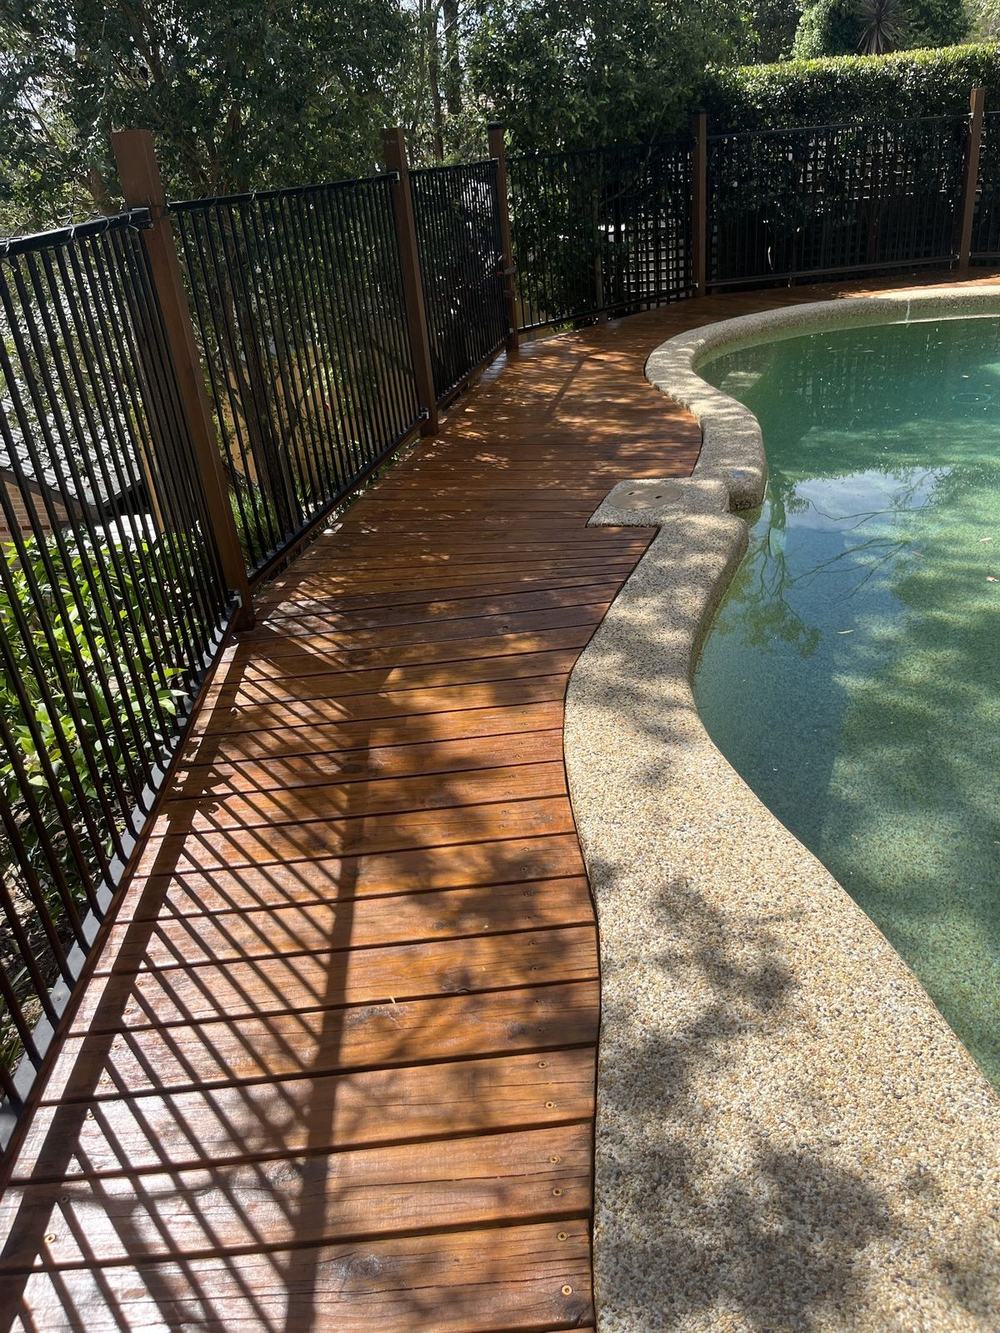
Sanding and restaining also gives you a good look at every board. On the same Mount Colah job the pool deck was grey and drying out. Sanded back and restained, it now sheds water instead of soaking it up:
 Before
 After
After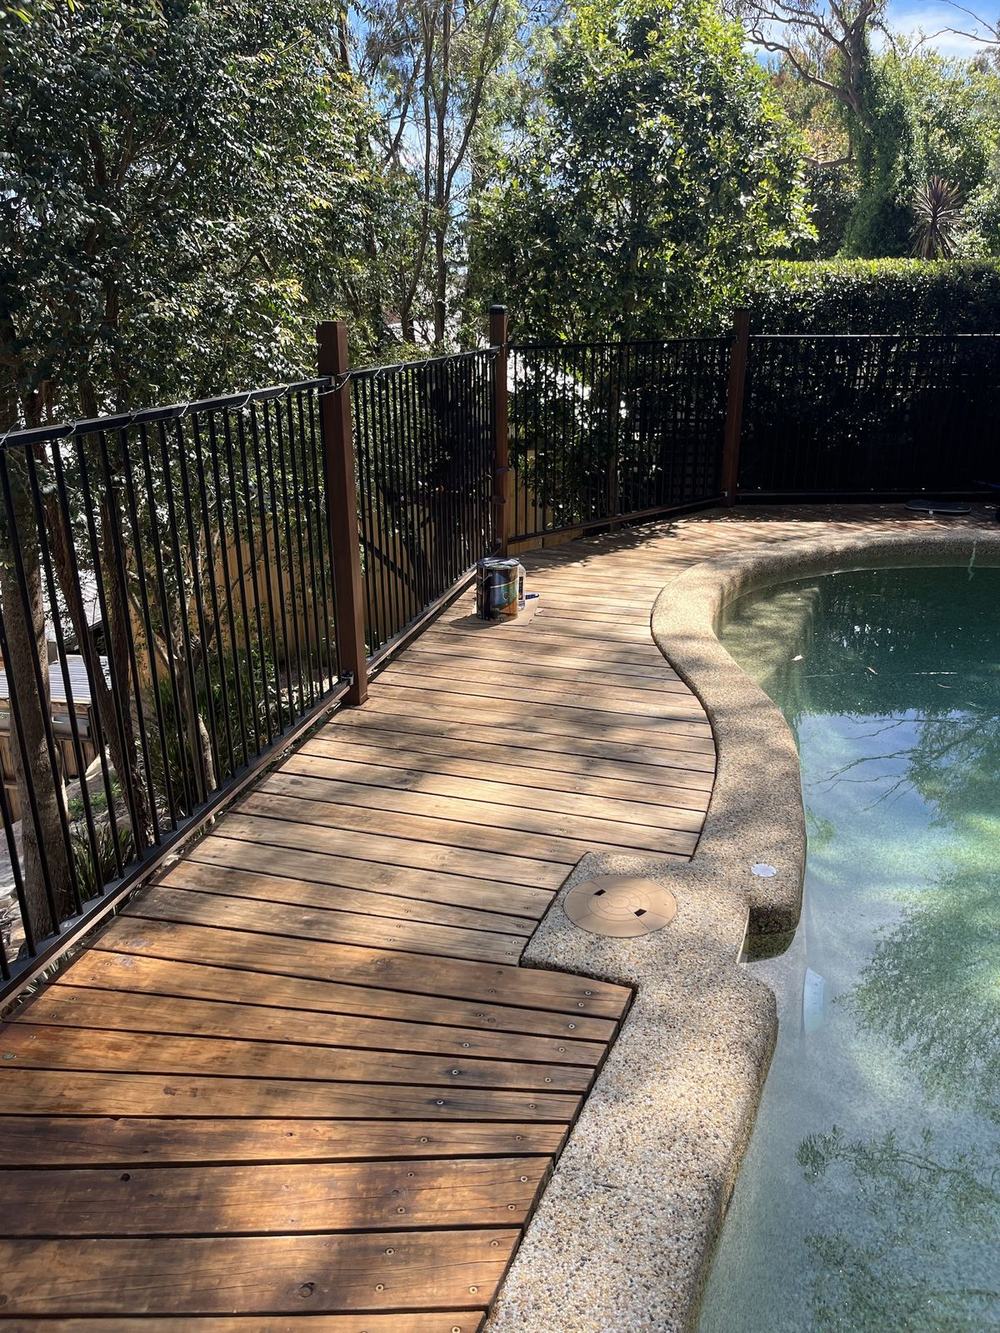 Before
 After
AfterPool deck, Mount Colah. See the full before & after gallery.
Not sure what you're looking at?
Text James a wide photo of the stairs and a close-up of the soft spot. That's usually enough to say whether it's a quick tread replacement, something bigger, or a job for a pest inspector first. James works from Pymble to Cowan, including Hornsby, Turramurra, St Ives, Gordon and Mount Colah.